
If you’ve rolled a Balance druid for Forever and you’ve watched a good one kite a Warrior around a flag room without ever seeming to stop casting, you’ve probably wondered which of the dozen things they were doing actually mattered, and what order you should learn them in. This guide is my answer to that. It takes the movement, casting and shapeshifting skills a Balance druid lives on in PvP, ranks them from the ones you need on day one to the ones that only matter in a particular matchup, and gives each the same treatment - what it is, why it matters, how to execute it, when to use it and when to leave it alone, a drill to practise it with, and the sign that you’ve actually got it.
Whilst I’ve spent years on druids across both factions and learnt most of these the slow way, I’ll keep the caveat that sits on everything I’m writing at the moment - Forever launches on the 4th of November, nobody has fought at level 60 on it yet, and that includes me. So every mechanic below carries a label saying how sure I am of it on the Forever client, the ones I couldn’t pin down are collected at the end with how I intend to test them, and none of it is presented as something I’ve already done in a Forever battleground, because I haven’t.
Before we start
This guide assumes a few things, and none of them are a reason you can’t read it. It assumes you’re playing something like the Balance and Restoration hybrid I wrote up in the datamine post, with no points in Feral, which matters because a couple of the tools other druids lean on (Feral Charge, a Bash with rage waiting behind it) aren’t ours. If your tree leans Feral, most of this still transfers and I’ll say so where it doesn’t. It also assumes you have Nature’s Grasp and Omen of Clarity from the trainer, which everyone does in Forever, and that you’re willing to change a keybind or two, because the first tier is mostly keybinds. Classic has no training dummies, so where a drill below says “a standing target” it means a friend who has agreed to stand still in a duel and do nothing, or failing that a grey-level mob you’ve tagged with Faerie Fire, which does no damage and keeps it standing there.
Every mechanic below is labelled, and the label is doing real work, so here is what each one means:
- Confirmed in the Classic rules Forever is built on and in Forever’s own notes or beta testing.
- Probable confirmed for Classic, no sign Forever changed it, not yet seen on the Forever client.
- Unverified widely repeated, nothing solid behind it, and it goes in the test list at the end.
- Obsolete true once, and Forever has removed or redesigned it.
Notably, the list of techniques I started from was a community list rather than scripture, and challenging it changed the guide. Powershifting for energy is gone from Forever, bear weaving was removed on purpose, the hunter dead zone is narrower than the folklore says once two people are moving, and a few things I’d have called basics (walking behind a caster to break their cast, for one) turned out to be arguments on a forum rather than mechanics. Those corrections are in the text where they belong rather than hidden.
Credit where it’s due, because very little of this is mine. The jump-turn drill is lifted almost whole from BigRedKitty’s jump shot column, which taught a generation of hunters to do it and transfers to a druid unchanged. The juking drill follows the WoW Insider arena skills piece. The dead zone numbers come from the author of the Forever DeadZone addon, who measured them on the beta client rather than remembering them. Fouren’s Forever Balance overview at wow.gg and Warcraft Tavern’s Forever druid coverage did the datamine reading I cross-checked against, and the Warcraft Wiki editors keep the patch history that settles most of the arguments.
The roadmap.
Seventeen skills in four tiers. Learn a tier before you borrow from the next one.
Foundation
The habits that make every other skill possible. Keybinds, the camera, and never giving ground for free.
Intermediate
The tricks people notice. Each one is a Foundation habit with a twist on top.
Advanced
Reading the other player and the state of the fight, then spending your resources against it.
Specialist
Matchup and objective play. Worth drilling once the rest is automatic, not before.
The rules underneath
Every skill in this guide exploits a rule in the game engine, so it’s worth knowing the rules first, because once you know them you can invent the tricks yourself rather than memorising mine. Essentially, a Balance druid’s PvP game is built on eight of them, and here they are with the label each one earned.
Facing Confirmed. A harmful spell needs its target inside your front arc at the moment you press the key, and a cast with a cast time needs it there at the end as well. An instant only ever checks once, which is the whole basis of the jump-turn. The arc is wide (think of a cone in front of you rather than a narrow line) which is why a part-turn is enough. The one exception worth knowing is Entangling Roots, which lost its facing requirement in patch 1.1 and in Classic can be cast on someone behind you Probable, so if a melee is on your back you don’t need to turn to root them, you need to stand still for a second and a half.
Movement Confirmed. Moving cancels a cast with a cast time, and jumping counts as moving. Turning, with the mouse or the keyboard, does not. An instant can be used mid-air. Your base run speed is 7 yards a second, backpedalling is 4.5, and strafing is the full 7, which is the single most important number in this guide. Travel Form adds 40%, Dash adds 50% at its first rank and a little more at its second, for 15 seconds on a five-minute cooldown, and Forever has given Tauren Plainsrunning, which builds a percent of speed every five seconds you keep running, up to 30%, and loses stacks when you stop or get hit Confirmed. Whether Plainsrunning keeps building inside Cat or Travel Form is one for the test list.
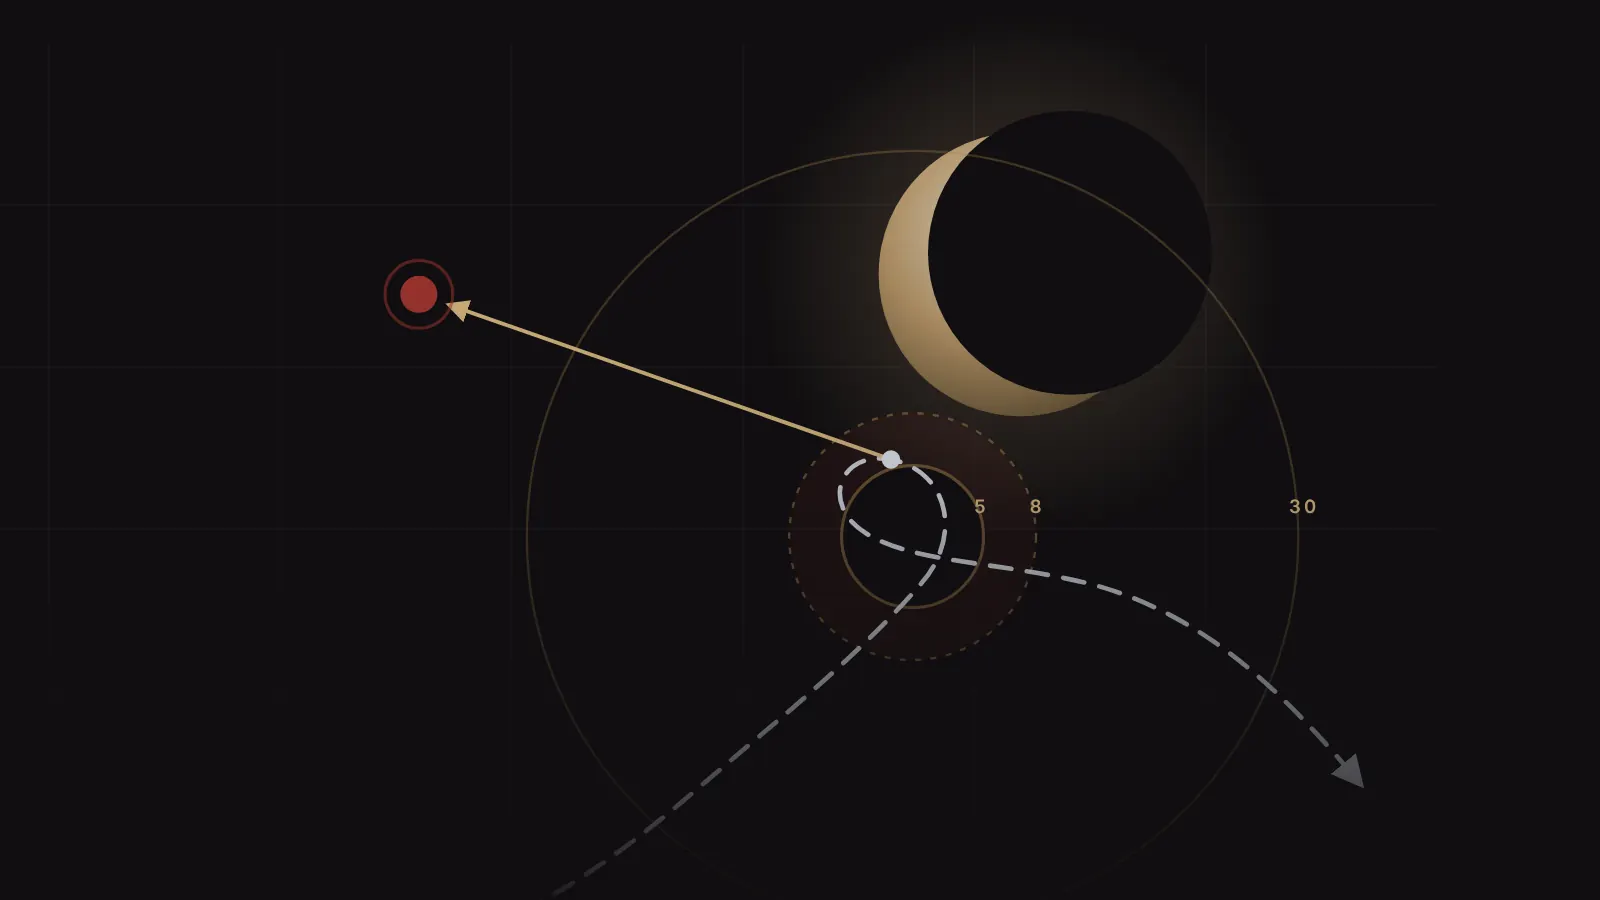
Reach Confirmed. Melee range is 5 yards, and when both of you are moving the game adds 2.66 yards of leeway to it, which Blizzard lists as original behaviour rather than a bug. A Tauren’s larger body adds a little more, in both directions. A hunter’s ranged attacks need 8 yards, Charge, Intercept and Feral Charge all need 8 and reach 25, and your own casts and Roots reach 30, further with Nature’s Reach. Those four numbers - 5, 8, 25, 30 - are the ones to learn by eye.
Pushback Confirmed. Every hit you take whilst casting pushes the cast back, and in this era that isn’t capped at two hits the way it was from Wrath onwards, so a fast melee or a hunter pet on you can turn a two-second Starfire into something that never finishes. The exact amount per hit on the Forever client is on the test list Unverified, the fact that it keeps going is not. Damage over time doesn’t push you back, fully absorbed damage doesn’t either, Nature’s Focus gives you a chance to ignore it, and Barkskin stops it entirely (in Classic at the price of a slower cast, and whether Forever kept that penalty is on the test list).
Interrupts Confirmed. An interrupt that lands on a cast in progress locks the school of that spell, and only that school. Kick locks for 5 seconds on a 10 second cooldown, Pummel 4 on 10, Shield Bash 6 on 12, Counterspell 10 on 30, Earth Shock 2 on 6, Feral Charge 4 on 15 and a Felhunter’s Spell Lock 8 on 30 with a short silence attached. An interrupt that lands on nothing locks nothing and still goes on cooldown. For us the schools are Nature (Wrath, Roots, Hurricane and every heal) and Arcane (Moonfire, Starfire), and keeping that split in your head is an entire Advanced skill.
Shapeshifting Confirmed. Shifting into a form removes roots, snares and Polymorph, and whilst you’re in one you can’t be sheeped at all. It does nothing for stuns, fears, Daze or Hibernate. Entering a form costs mana and a global cooldown, leaving one costs neither, and because the shift spends mana it restarts your five-second rule (the five seconds after any mana spend in which Spirit regeneration stops). In Forever, Barkskin, Nature’s Grasp, Faerie Fire, War Stomp and nearly every potion work from inside a form, and the old powershift for free energy is gone Obsolete, which for a Balance druid changes nothing you’d miss.
Roots Confirmed. Entangling Roots is a 30 yard, 1.5 second cast that holds a player in place and breaks when they take enough damage. In Forever it works indoors, which is new and matters most in world PvP (battlegrounds already counted almost everywhere as outdoors), and you can only hold one target at a time unless you spend a talent point on a second (Overgrowth, as of the datamine), because a fresh Roots on a second target releases the first. Nature’s Grasp is baseline, castable from any form, and gives the next melee hit on you a chance to root the attacker (35% a hit at the Classic ranks, and I’ll read the Forever tooltip on launch). Roots share diminishing returns with Frost Nova and friends - full, then half, then a quarter, then immune, resetting after 15 to 20 seconds without a root on them.
Spells on the move Confirmed. Moonfire and Insect Swarm are instant and usable whilst moving, Faerie Fire is instant from any form in Forever, Nature’s Grasp is instant, and every shift is instant. Wrath, Starfire, Roots and your heals are not. That split, instants whilst moving and casts whilst stood still, is the rhythm the whole Foundation tier teaches.
| Mechanic | Status | What I checked it against |
|---|---|---|
| Backpedal 4.5 yards a second, run and strafe 7 | Confirmed | Classic movement speed tables, unchanged client values. |
| Melee leeway of 2.66 yards whilst both move | Confirmed | Blizzard’s Classic not-a-bug list and the beta leeway tests. |
| Instants can be used mid-jump, casts cannot | Confirmed | The jump shot as documented since 2007, no Forever change found. |
| Roots castable indoors, one target at a time | Confirmed | Forever’s Hunter and Druid deep dive and the wiki’s Forever entry. |
| Roots need no facing | Probable | Patch 1.1 note, not personally tested on the Forever client. |
| Shift breaks roots, snares and Polymorph only | Confirmed | Patch 0.12 and 1.4 notes, Forever druid guides repeat it. |
| Leaving a form costs no global cooldown | Probable | Classic macro testing, no Forever note either way. |
| Pushback uncapped per cast | Confirmed | The two-hit cap was added in patch 3.0.2, which Forever predates. |
| Exact pushback per hit | Unverified | Sources give 0.5 to 1 second per hit, nothing measured on Forever. |
| Interrupt durations and cooldowns | Confirmed | Classic spell data, no Forever change found for Kick, Pummel or Counterspell. |
| Hunter dead zone kept, 5 to 8 yards | Confirmed | Measured on the beta client by the DeadZone addon author. |
| Hunter traps usable in combat | Confirmed | Forever hunter changes, 30 second cooldown reported. |
| Barkskin, War Stomp, potions, Faerie Fire in forms | Confirmed | Forever druid and Tauren change lists. |
| Nature’s Grasp baseline, in forms, indoors | Confirmed | Forever deep dive summaries and the datamine. |
| Plainsrunning in forms | Unverified | The racial is documented, its behaviour in Cat and Travel isn’t. |
| Powershifting for energy | Obsolete | Energy no longer carries into Cat and Furor was redesigned. |
| Bear weaving | Obsolete | Blizzard says the Furor rule exists to stop it. |
| Walking behind a caster cancels their cast | Unverified | Contested on the forums, the caster can turn, treat it as untrue. |
| Downranked Moonfire and Roots | Confirmed | Forever penalises ranks well below your level, thresholds unpublished. |
Foundation
These five are the habits everything else stands on, and in my opinion, and it is an opinion, a druid who has only these five and nothing from the later tiers will beat a druid who has the jump-turn and the fake cast but backpedals. The later skills are each a Foundation habit with a twist on top, so if a trick from tier two keeps failing you, the fix is usually back here.
Strafe, never backpedal Confirmed
Essentially, your character has three speeds. Running forward or strafing sideways (moving sideways whilst still facing forward) is 7 yards a second, and walking backwards is 4.5. A Warrior running at you is doing 7, so every second you spend backpedalling away from him he closes 2.5 yards for free, and from 20 yards out he’s on you in eight seconds without pressing a single button. Strafe away from him instead, with your camera turned so you’re moving at an angle, and he gains nothing at all until he uses a cooldown.
The reason this is Foundation rather than obvious is that the default keybinds fight you. A and D turn your character on a fresh install, which is slow and useless, and the strafe keys sit out on Q and E where your fingers never rest. Fix that before you fix anything else.
- How to execute, bind strafe left and right to
AandD, unbind turn left and turn right entirely so you can’t fall back on them, and do all of your turning with the right mouse button held. To move away from someone at full speed, turn the camera 90 degrees with the mouse and strafe, or turn fully and run, and never touchSin a fight except to shuffle a single step out of a fire. Holding both mouse buttons runs you forward too, which frees your left hand for abilities. - When to use it, always. There is no situation in a fight where walking backwards at 4.5 beats moving sideways at 7, because strafing keeps your front arc on the target just as well as backpedalling does, and that was the only argument for it.
- When not to, the only exception is a deliberate half-step backwards out of a cone or a ground effect when turning would cost more time than the step, and even then it’s a step, not a retreat.
- Practice drill, pick a path around Orgrimmar’s Valley of Strength and run it three times with your target locked on a friendly in the middle, keeping them in your front arc the whole way by strafing and mouse-turning only. Then do it again with
Sunbound, so you find out how often your hand still reaches for it. Ten minutes a day for a week is enough. - You’ve got it when, you finish a battleground and can’t remember pressing
S, and when a melee has to spend Charge or Intercept to get to you rather than just walking.
The camera and the front arc Confirmed
Every harmful spell you have except Roots needs the target to be inside your front arc when you press the key, and the arc is a wide cone rather than a line, so most of the time you don’t need to be looking at someone to cast on them, you need them to be somewhere ahead of your character. The skill is knowing where the edge of that cone is without thinking about it, and being able to put someone inside it with a flick of the mouse whilst your legs keep doing something else.
Turning never cancels a cast, with the mouse or otherwise, which is what makes the rest of this guide possible. You can start a Wrath, turn your character a full circle with the right mouse button whilst it casts, and so long as the target is in front of you when the bar fills, it lands.
- How to execute, zoom the camera out as far as the game allows (the camera distance slider in the interface options, and the
cameraDistanceMaxZoomFactorconsole setting if the slider stops short, are worth setting once and forgetting) and play from above and behind so you can see who is at your back. Turn with the right mouse button in short, deliberate flicks rather than long drags, and get used to casting on things that are 60 degrees off your nose rather than squaring up to them. - When to use it, every time you want to cast on something that isn’t straight ahead, and particularly whilst strafing, where a quarter-turn of the camera is the difference between a kite and a chase.
- When not to, the mistake is over-turning. If you spin fully to face a target you’ve given up the angle that was keeping you away from them, so turn just enough and no further.
- Practice drill, stand 20 yards from a standing target, strafe in a circle around it, and keep Moonfire or Faerie Fire going on every global without ever stopping. Note how far off centre the target can be before the spell refuses with the facing error, and then run the circle the other way. Five minutes, both directions, until the error never appears.
- You’ve got it when, you stop seeing the facing error in battlegrounds and you can name, without looking, which side of you a chasing melee is on.
Instants on the move Confirmed
Moonfire, Insect Swarm, Faerie Fire and Nature’s Grasp are all instant, and every one of them can be cast whilst you’re running. Wrath, Starfire, Roots and your heals can’t. So a Balance druid in a fight has two modes, moving and casting, and the Foundation skill is to make the moving mode productive rather than a pause. Whilst you reposition you put the dots up, refresh Faerie Fire on anything that might stealth, arm Nature’s Grasp, and only stop when there’s a cast worth stopping for.
The rhythm people call stutter-stepping is this exact thing with the pauses trimmed. An instant triggers a global cooldown of a second and a half, and you can’t cast anything else for that second and a half, so you may as well be moving during it. Instant, move, instant, move, and only plant your feet when a global comes up and the cast you want is a hard cast.
- How to execute, press the instant and start moving in the same motion, not after. Keep moving for the length of the global, press the next instant, and keep moving. When you want a Wrath, stop, start it, and start moving again the moment the bar completes. Think in casts you finished, not casts you started. If a target dies with your Moonfire still ticking you spent that global well, if a Wrath got pushed back three times and never landed you didn’t.
- When to use it, whenever something is closing on you or you’re moving between objectives. The dots do real damage in Forever now that Genesis adds 10% to them, so this isn’t filler, and Moonfire on a Rogue who hasn’t opened yet is a global you’ll be glad of.
- When not to, when nobody is on you and you have a clean cast window. Instants whilst moving are what you do under pressure, and a druid who dances when they could be standing still casting Wrath is giving up damage for the feeling of being busy.
- Practice drill, with a standing target, set yourself a lap and put Moonfire, Insect Swarm and Faerie Fire up without stopping, then stop for exactly one Wrath, then resume the lap and refresh whichever dot drops first. Do it until the Wrath goes out the moment you stop and your feet move the moment it lands.
- You’ve got it when, a melee chasing you across a battleground arrives with Moonfire, Insect Swarm and Faerie Fire already on them and a third of their health gone, and you didn’t stop once.
The shift that breaks a root Confirmed
Any shift into a form removes roots, snares and Polymorph, and inside a form you can’t be sheeped at all. That rule is older than most of the people playing Forever and it’s the reason a druid is hard to pin down. What it doesn’t do matters just as much, because new druids learn the first half and then shift frantically through a stun. Shifting does nothing for stuns, fears, Daze (the slow you get hit with from behind whilst moving) or Hibernate, and whilst you’re in Cat or Bear a Hunter’s Scare Beast and a druid’s Hibernate both work on you.
Every shift in costs mana and a global, and the shift out costs nothing, so a root-break is really a one-global, some-mana purchase of your legs back. That’s cheap against a Frost Nova. It’s less cheap the fifth time in a fight, which is what the Advanced tier is about.
- How to execute, bind Travel Form and Dire Bear Form where your fingers already are and put
/stopcastingat the top of both macros so a shift mid-cast doesn’t get eaten by the cast. The pattern is/stopcasting, then/cancelform [noform:4], then/cast [noform:4] !Travel Form, where the number is the form’s position in your spellbook (Bear is1and Travel is usually4, check yours). The exclamation mark stops a second press shifting you back out. For a snare outdoors go to Travel, for a root with a melee already on you go to Bear, and in either case shift the instant the effect lands rather than after you’ve thought about it. - When to use it, on roots and snares that matter, which is a Frost Nova with a Frostbolt behind it, a Hamstring when you’re trying to make distance, Crippling Poison, a Hunter’s Wing Clip or Entrapment, and the moment a Mage sheeps you in caster form.
- When not to, on a stun or a fear, where the button does nothing and the mana is gone, and on a snare that doesn’t change anything, because a slow whilst you’re stood still casting anyway costs you nothing until you want to move.
- Practice drill, have a Mage friend nova you at 15 yards and count how long it takes you to be moving again, then do it ten times. No Mage friend? Count your reaction to the first ten snares you take in a battleground instead. Under a second is the aim, and the macro with
/stopcastingon top will get you there faster than your reflexes will. Then have them sheep you and do the same. - You’ve got it when, a Frost Nova on you lasts about as long as it takes the Mage to see it land, and you never press a form during a stun.
Range discipline Confirmed
Four distances decide most of your fights. Five yards is melee, and when both of you are moving the game adds a yard or so of leeway to that, so call it eight in practice. Eight is where a Hunter can shoot again. Eight to 25 is where Charge, Intercept and Feral Charge can be used on you, and 30 is the edge of your own casts and Roots. The skill is seeing those lines on the ground without a range addon, and spending the fight at the one that suits you, which for a Balance druid is as close to 30 as you can get and still land spells.
In my opinion the number most people get wrong isn’t 30, it’s 25. A Warrior at 26 yards is a Warrior who has to run, and a Warrior at 24 is one who can be on you in a second with a stun attached. A couple of yards of discipline turns one into the other.
- How to execute, learn the distances off your own spells. Roots reaches 30 flat and Moonfire reaches further with Nature’s Reach, so Roots lit means inside 30, Moonfire lit with Roots dark means you’re in the Reach band, and your melee attack lighting up means they’re inside 5. Watch the action bar, not the character models. Against a Warrior out of combat, hold 26 to 30 and he can’t Charge, and when he commits and starts running, that’s your Roots cast, because he can’t cancel his legs.
- When to use it, every fight, but most of all in the first five seconds, which is when range is set. Whoever starts the fight at their preferred distance usually keeps it.
- When not to, maximum range costs you Reach-less heals and makes the jump-turn harder to aim, so against a caster who can match your 30 there’s less to gain from the edge than there is against a melee, and against a Hunter you may want to be far closer than this skill suggests, which is a Specialist matter.
- Practice drill, on any mob (nothing needs casting, the buttons grey on their own), walk out until Roots greys and mark the spot, walk in until your melee attack lights and mark that. For 25, step back from a Warrior friend one pace at a time until Charge greys on his bar, and for 8, do the same with a Hunter friend until Auto Shot lights. Learn what those gaps look like on the ground.
- You’ve got it when, Warriors stop Charging you, because you’re never standing where they can.
Intermediate
Tier two is the set of tricks people notice, and each one is a Foundation habit with something bolted on. The jump-turn is strafing plus the front arc plus an instant. Corners are range discipline with a wall in the way. The fake cast is a Wrath you decided not to finish. If any of them keep going wrong, look at the habit underneath before you look at the trick.
The jump-turn Confirmed
Essentially, the jump-turn is how you cast an instant at someone behind you without ever slowing down. Your momentum is fixed the moment you leave the ground, so whilst you’re airborne you can spin your character with the mouse, put the pursuer inside your front arc, fire Moonfire or Faerie Fire, spin back and land still running in the same direction at the same speed. The whole thing takes less than a second and costs you no distance at all, which is the point - the alternative is stopping, turning, casting and turning back, and against a melee that’s a free Charge.
BigRedKitty wrote the canonical drill for Hunters in 2007 and it transfers to a druid unchanged, because the mechanic is the game’s and not the class’s. His one number worth remembering is that the facing cone is about 60 degrees to either side, so a spin of roughly 120 degrees is enough. Most people do a full 180 because it’s easier to feel, and that’s fine too.
The jump-turn.
From above, and on the clock. The instant goes out at the top of the jump and the landing is already facing away.
Drag the diagram sideways to see all of it.
- How to execute, run with both mouse buttons held, press jump with your thumb or a spare finger, keep the right mouse button down and drag the mouse hard to one side so your character spins, press the instant whilst the pursuer is in front of you, drag the mouse back the other way, and land. The spell key and the jump key need to be on different fingers, so if jump is on
Spaceput the instant you’ll fire most often on a mouse button or a key your index finger can reach whilst your thumb is on the bar. - When to use it, whenever you’re kiting and a global comes up, to keep Moonfire and Faerie Fire ticking on the chaser without giving them a single yard. It’s also the right way to put Nature’s Grasp up mid-kite, because Grasp is instant and goes out the same way.
- When not to, for anything with a cast time, because the landing cancels it, and on uneven ground where a jump sends you off a ledge. It’s also the moment you’re most predictable, so a Hunter who has watched you do it twice will time a Scatter Shot for the apex.
- Practice drill, BigRedKitty’s progression, in a quiet zone. Day one, run and jump and spin the full 180 in the air, land, keep running, and do nothing else until the spin feels like one motion. Day two, add the spin back, so you land facing the way you were going. Day three, add a Rank 1 Moonfire at the top, on a mob you’re running away from, and keep going until you land it ten times in a row. Then halve how far you spin and see if the spell still goes out. When it does, Congratulations! That one is yours for good.
- You’ve got it when, you can kite a melee the length of the Warsong Gulch midfield keeping both dots on them and they never once get inside 8 yards.
Corners and line of sight Confirmed
A wall between you and a caster cancels anything they were casting at you, and a wall between you and a melee turns a five-yard problem into a twenty-yard walk around a building. Line of sight (whether a straight line from them to you is blocked by terrain) is the cheapest defensive tool you own, because it costs no mana, no global and no cooldown, and it’s the one most newer players never use, because they fight in the open where they can see.
The battlegrounds are full of it. The huts at either end of Warsong Gulch, the ramp and tunnel mouths, every building in Arathi Basin, and the corners of the Blacksmith are all objects you can put between you and someone, and the right habit is to fight within a few steps of one rather than in the open ground between them.
The lines on the ground, and the wall.
On the left, the four distances from Range discipline around a stationary druid. On the right, what one corner does to two attackers.
Drag the diagram sideways to see all of it.
- your 30 yard reach
- their Charge and Intercept band, 8 to 25
- the 5 to 8 dead zone
- a caster with no line to you
- How to execute, pick the object before the fight starts and fight beside it. Against a caster, step out to cast, and step back behind the wall the moment you see their cast bar start, which cancels it and costs them the full cast time. Against a melee, put the object between you and them, and when they commit to one side go round the other, re-rooting or re-dotting as you go. Keep your own line to the target clean, because the wall blocks your Wrath exactly as well as it blocks their Frostbolt.
- When to use it, against any caster, against a Hunter above all (a Hunter with no line of sight has nothing), and whenever you need two seconds to drink or heal.
- When not to, when the objective is on the other side of the wall. A base you can’t see is a base you’re not defending, and a druid hiding behind the Lumber Mill whilst it gets capped has won the duel and lost the game. It also helps a Rogue, who would like nothing more than for you to stand in a corner with your back to a wall.
- Practice drill, duel a Mage friend at the Blacksmith with the rule that you’re only allowed to cast from a position where one step takes you out of their sight. Count how many of their casts you cancel with the step rather than with a shift or a root. Then swap and let them do it to you, which teaches you what it looks like from the other side. Solo, pull a caster mob to a building and count the casts the corner cancels.
- You’ve got it when, a caster friend tells you after a duel that at least half their casts failed to line of sight.
Root, walk, cast Confirmed
Entangling Roots is a 1.5 second cast that holds a player exactly where they are, and in Forever it works indoors as well, which matters more for world PvP (caves, city buildings, the inside of Blackrock Mountain) than for battlegrounds, where nearly everything already counted as outdoors. The skill is what you do with the time it buys. The naive version is to root a melee and cast Wrath at them, which works until the damage breaks the root, usually the moment the second Wrath lands, and then they’re on you with a snare still ticking. The better version is to root them, walk calmly out to 25 or 30 yards where Charge and Intercept can’t reach, and then cast.
That said, the order matters and so does the damage. Roots breaks when the target has taken enough of it, and your own Moonfire ticking on them counts, so a target you want held is a target you dot lightly or not at all. Nature’s Grasp gives whoever hits you next a chance to eat the same root, from any form, which makes it the pre-emptive version. Arm it before the melee arrives and the first swing they land has a chance to root them, 35% a hit at the Classic ranks, without you casting anything.
- How to execute, Roots on a key with
/stopcastingabove it, Nature’s Grasp on a key you can reach in Bear. When a melee commits, stop, root, and then walk to your distance before you start casting. If a root lands and you’re already at range, that’s a Starfire, your longest cast, which is the one you can never usually afford. Against two attackers, root the one who hurts most and use the corner for the other. - When to use it, at the start of a melee fight to set the range, mid-fight whenever your root is off diminishing returns, and from launch day in the caves and buildings where it used to fail.
- When not to, on a target you’ve just dotted heavily, because it’ll break before you benefit, into diminishing returns (see the Advanced tier), and when a shift would do. Rooting a Rogue who can Vanish, without Faerie Fire on him, is a 1.5 second cast for a root that lasts until he wants it to.
- Practice drill, against a Warrior friend, root at 20 yards and walk to 30 before casting a single spell, and count how many Wraths you land before the root breaks. Then do it rooting at 20 and casting on the spot. The difference is the drill, and a mob a few levels below you that you root and walk away from does the same job solo. Then try it somewhere that used to refuse the cast, the Ragefire Chasm entrance tunnel will do, because indoor roots are new to all of us.
- You’ve got it when, the root is still on them when your Starfire lands.
The fake cast Confirmed
An interrupt only locks a school if it lands whilst a spell is actually casting, and an interrupt that lands on nothing still goes on cooldown. So you start a cast you don’t need, cancel it just before the point where a reasonable opponent would kick it, and if they do, you have the ten seconds of their cooldown (Kick’s, the lock itself is five) in which they can’t kick again, and the cast you actually wanted goes out in that window. If they don’t, you’ve learnt they’re patient, and that’s worth knowing too.
The cost is real, which is why it’s Intermediate. Every fake is a global’s worth of time you weren’t doing damage, so against someone who doesn’t have an interrupt, or isn’t using it, you’re juking a ghost.
One fake cast.
The bait, the cancel, their wasted Kick, and the real cast inside their cooldown.
Drag the diagram sideways to see all of it.
- How to execute, put
/stopcastingon its own key, close to hand. Start a Wrath, watch the opponent rather than your own bar, and cancel at about half if they’re the type who kicks early, three quarters if they wait. A jump also cancels a cast and is harder for them to read as deliberate. Bait with the school you can spare (Nature holds Wrath, Roots and your heals, Arcane holds Moonfire and Starfire, and the Advanced tier is built on that split), which for us is usually Nature, so that if the fake goes wrong and the kick lands, Moonfire and Starfire are still open. Then cast the thing you wanted, which is often Roots. - When to use it, against Rogues, Warriors and Mages with their interrupt up, and before a cast that decides the fight, so a heal, a Roots on a melee, or a Starfire into a kill.
- When not to, against anyone whose interrupt you’ve just watched them spend, against classes with none, and when you’re under pushback already, because a half-cast that gets pushed back and then cancelled is time spent twice.
- Practice drill, the WoW Insider version. Duel a Rogue friend and start every cast intending to cancel it, first at 50%, then at 75%, and write down where their Kick landed each time until you can predict them. Then play the duel properly and see how many kicks hit a cast that mattered. The number you’re chasing is zero. Solo, the next three Rogues who open on you in Warsong are your drill partners.
- You’ve got it when, in a duel against someone with a kick, it lands on a cast you needed at most once.
Picking a form under pressure Confirmed
You have four bodies to choose from in a fight, and the mistake most Balance druids make is treating three of them as emergency buttons rather than positions. Caster form (or Moonkin, which casts the same spells and blocks your heals) is where your damage lives. Bear is armour, health, Bash, and in Forever a Frenzied Regeneration that heals a large share of your bar if you have the rage for it, with Barkskin now usable from inside. Travel is 40% speed outdoors and the way you reset a fight. Cat is a snare break at normal run speed, one Dash every five minutes and a Prowl out of combat, and on a build with no Feral points it is nothing else.
The decision usually comes down to one question, which is whether the thing about to kill you is a lack of distance, a lack of health or a lack of a cast. Distance is Travel, health is Bear, and a cast is caster form, stood still, with the sacrifice that implies (for a hybrid that includes leaving Moonkin to heal, which is the most expensive shift you make).
Which form, and why.
Six questions, read top to bottom. The first one that’s true decides.
Are you stunned or feared?
Shifting removes neither. Trinket if it’s the one that kills you, otherwise wait it out.No form fixes this. Don’t spend mana and a global on a button that does nothing.
Is a melee on you, and are you below half?
You’re about to lose the health race.Barkskin inside it. Bash if they’re casting or you need two seconds. Frenzied Regeneration when the rage is there. Nature’s Grasp from in here still works.
Is a melee on you, and are you above half?
You have time, but not much.Grasp first if it isn’t up. Roots needs no facing, so root them on your back and walk to 30.
Does someone, maybe you, need a heal you can only cast out of Moonkin?
Every heal lives in caster form, and so does the sheep risk.Step behind a wall first, then Rejuvenation and Swiftmend or a Regrowth, then back in. Two shifts’ mana for one heal, so make it count.
Are you snared or rooted outdoors, with room to run?
Distance is the problem, not health.Break the effect and make 30 yards. Shift out and root when they commit again. Indoors, where Travel won’t go, Cat breaks the snare and Dash is the speed.
Is a root up, or do you have a clean window?
Nothing is on you for the next two seconds.Spend the window on the cast that changes the fight, which is Starfire if they’re low and Roots or a heal if they’re not.
- How to execute, decide the form before the shift, not after, and shift once. The pattern that loses fights is Bear, then caster to heal, then Bear again, three globals and three lots of mana for one heal that got kicked. Go Bear, use Bash and Barkskin and Frenzied Regeneration from inside it, and only leave when the melee has spent their cooldowns or you’ve got a root on them. Potions work in forms now, so a healing potion in Bear is a heal that can’t be interrupted.
- When to use it, every time the question above changes its answer, which in a long duel is three or four times, and no more than that.
- When not to, reflexively. A shift that isn’t answering one of the four questions is a global and some mana spent on feeling safer, and it restarts your five-second rule as well.
- Practice drill, duel a Warrior friend and say the form out loud before you press it, with the reason. “Bear, I’m at 40%,” or “Travel, Hamstring and he’s got nothing left,” and if you can’t say the reason, don’t press it. No Warrior handy? Say it under your breath through a whole battleground instead. It feels ridiculous for two duels and then the reasons start arriving before the fear does.
- You’ve got it when, you finish a duel having shifted three times, and each shift was the one that made sense, and the mana bar shows it.
Advanced
Tier three is less about your hands and more about reading the other player and the state of the fight. None of these four need faster reflexes than the Intermediate tier, they need you to be counting things whilst you do everything else, which is why I’d leave them until the first ten skills are automatic. A druid still thinking about which key is Travel Form has no attention spare for which school a Rogue just locked.
School baiting Confirmed
An interrupt locks the school of the spell it landed on and nothing else, and a Balance druid casts from two. Nature holds Wrath, Entangling Roots, Insect Swarm, Hurricane, Hibernate and every heal you own. Arcane holds Moonfire and Starfire, and that’s all it holds. Your shifts are physical and can’t be locked at all. So a Kick on your Wrath costs you five seconds of Nature, during which you can still Moonfire, Starfire, and shift, and a Counterspell on a Starfire costs you ten seconds of Arcane, during which Roots and every heal are wide open.
School baiting is choosing which of those two you’d rather lose before the interrupt comes. Against a Rogue with Kick up when nobody needs a heal in the next five seconds, you cast Wrath and let him kick it, because a Nature lock costs you a cast you could spare and buys you the ten seconds of his cooldown in which Starfire can’t be stopped. Against a Warrior who has you at 30% and a Pummel ready, you cast Moonfire-school spells and take the Arcane lock, because the heal you need lives in Nature. Think in which school you can afford to lose, not which spell you’d like to cast.
- How to execute, before each hard cast, name the school and name what a lock on it would cost you. If the answer is “nothing I need in the next five seconds”, cast it and let them have it. The common sequence against melee is Wrath to draw the kick, then Starfire or Moonfire through the lock whilst they wait for their cooldown, then Roots as the Nature lock ends, still inside his cooldown. Against a Mage with Counterspell, which is off the global and lands from 30 yards, treat every Starfire as bait and keep Nature for the heal.
- When to use it, any time an interrupt is up and you can see it coming, which against Rogues, Warriors, Shamans and Mages is most of the fight.
- When not to, when you need both schools in the next ten seconds, in which case fake first and bait second, and against a Felhunter’s Spell Lock, which adds a silence that no school choice helps with.
- Practice drill, write the two columns on a sticky note and put it on the monitor for a week. Nature on the left, Arcane on the right. Then duel a Warrior friend and announce the school you’re baiting before each cast. It’s the same drill as the forms one, and it works for the same reason.
- You’ve got it when, the casts you lose to interrupts are ones you could spare, and the heal or root you needed went out.
Counting their cooldowns Probable
A fight has a shape, and the shape is set by a short list of cooldowns on the other side. For a melee it’s the interrupt and the gap closer (Kick and Sprint, Pummel and Intercept, Feral Charge and Dash). For a caster it’s the interrupt, Blink or an escape, and the trinket. The skill is knowing at any moment which of those are available to the player in front of you, and the reason it’s Probable rather than Confirmed is that this client has no focus target, so the addon tooling arena players lean on for this either doesn’t exist or works through macros, and you’ll be doing a lot of it in your head.
The one that matters most to a druid is the PvP trinket. Rank 2 of Forever’s honour system hands one to everyone, so assume everyone has it from the second week, and whilst I couldn’t pin down before launch exactly which effects the Forever version removes, plan as if it breaks your Roots, because in the worst case it does. A root that gets trinketed has told you the trinket is gone for minutes, which is when a Bash or a War Stomp decides a duel, and a root they didn’t trinket has told you they’re saving it for something they fear more.
- How to execute, pick three things per class and count only those. Warrior: Pummel, Intercept, trinket. Rogue: Kick, Sprint or Vanish, trinket. Mage: Counterspell, Blink, trinket. Hunter: Scatter Shot, trap, trinket. Say them when you see them spent, out loud if you’re streaming and under your breath if you’re not, with the rough time they come back (Intercept 30, Kick 10, Counterspell 30, Blink 15). Then make your big cast inside the window where the thing that stops it is down.
- When to use it, in every duel and every one-on-one that develops in a battleground, and especially when deciding whether to commit a Starfire or hold a Roots.
- When not to, in a team fight with five people on screen, where counting three cooldowns on five players is fifteen numbers and you’ll drop the ones that matter. Count the player on you and let the rest go.
- Practice drill, watch one of your own duels back on the VOD and pause every time the opponent uses something from their list of three. Write the timestamp, and next to it write what you did in the following ten seconds. The drill is seeing how often the answer was “nothing different”, and then making it something different.
- You’ve got it when, you can tell someone after a duel what the opponent had left when they died, and you’re usually right.
Diminishing returns on roots Probable
Every root you land on a player makes the next one shorter. The first is full length, the second is half, the third a quarter, and the fourth does nothing at all, and the counter resets after 15 to 20 seconds without a root on them. Frost Nova is on the same counter as your Roots, and so is the root from Nature’s Grasp, which means a Grasp that triggers whilst you were planning a hard-cast Roots has just spent your full-length one for you. Think of it as three roots a fight, not infinite ones.
Put numbers on it. If your first Roots lands for its full length (rarely more than about 15 seconds on a player in Classic, because periodic resist checks end it early, and the Forever figure goes on the test list) and you re-root the moment it breaks, the second gives you six or so, the third three, and the fourth nothing. Spaced out, with twenty seconds between them, every one is a full root. So a druid who roots on cooldown gets maybe 24 seconds of control out of a fight, and a druid who roots when it matters gets 15 every time.
- How to execute, treat the first root as the one that sets the fight, the second as the one that buys a heal or a Starfire, and the third as a three-second emergency you might not get. Don’t fire Nature’s Grasp into a target you’re about to hard-cast on, and don’t re-root something you’ve just rooted unless the half-root is worth the global, which against a melee at 40% health it may well be.
- When to use it, always, but it decides things in long duels and base defences, where a fight runs past 30 seconds and you’ve a chance of the counter resetting if you hold.
- When not to, the mistake in the other direction is hoarding a root to avoid diminishing returns whilst you die with it unused. A half-root that saves you beats a full root you were saving.
- Practice drill, have a friend stand still and take four Roots in a row, timing each with a stopwatch, then wait 20 seconds and do it again. You’ll see the shape once and never forget it. Then duel them with a rule that you may only root three times and count whether you needed a fourth.
- You’ve got it when, your second root always has a Starfire or a heal planned behind it, and you never cast a fourth.
Mana and the cost of a shift Probable
Duels on this class are decided after the cooldowns are spent, by whoever can still afford to act, and shifts are where a Balance druid’s mana quietly goes. Every shift in costs mana (call it 350 at 60 before Natural Shapeshifter takes its 30% off, a figure I’ll correct from the tooltip on launch), it costs a global you weren’t casting, and because it spends mana it restarts your five-second rule, so a druid who shifts every few seconds never sees a tick of Spirit regeneration for the whole fight. Reflection keeps some of that regeneration going through the rule, and in the Forever datamine it keeps a lot, which is part of why I take it.
So a fight with six shifts in it has cost you roughly 2,100 mana at the raw figure, or about 1,500 with the talent, which is five or six Wraths you didn’t cast. Three of those shifts were probably necessary. The other three were nerves. Leaving a form is free and doesn’t trigger a global, so the cheap sequence when you’re in Bear and want one cast is cancel, cast, re-enter, which is one shift’s cost rather than two.
- How to execute, count your shifts in a duel the way you count their cooldowns, and give each one a reason from the form decision map. You can’t drink in combat and a corner doesn’t drop it, so the mana potion goes in behind a wall, and a drink only once you’ve Travelled far enough for the combat flag to fall. Omen of Clarity procs from your casts in Forever, twice as often in Moonkin, and Wrath never spends it, so the cat weaving post explains why there’s no reason to go looking for procs in melee.
- When to use it, in every fight that will last longer than your mana bar, which at 60 is most duels and every base defence.
- When not to, in a fight that ends in fifteen seconds either way, where saving 350 mana for a future you won’t have is the wrong economy. Spend it all if spending it all wins.
- Practice drill, after your next five duels, screenshot your mana bar at the end and write down how many shifts you made. If the two numbers move together, which they will, cut the shifts you couldn’t give a reason for and run the five again.
- You’ve got it when, you win the long duels, the ones that go past two minutes, more often than you lose them, because you were the one with casts left.
Specialist
These three are matchup and objective play, and I’ve put them last because they only pay off once everything above is automatic, and because the first of them is the one the community list got most wrong. A newer player who starts here will learn a hunter trick that works a third of the time and never learn to strafe.
The hunter’s dead zone Confirmed
Forever kept the old Hunter rule, which the DeadZone addon author measured on the beta client rather than taking on trust. A Hunter’s ranged attacks need the target at 8 yards or more, and their melee reaches about 5, so between 5 and 8 they have the pet, Wing Clip, Raptor Strike, Scatter Shot and traps and nothing else. The folklore says to stand there. The measurement says the band is three yards wide stood still and all but gone once you’re both moving, because leeway stretches their melee reach out to nearly 8, and a Tauren’s hit box gives a little more on top. So it exists, it’s narrow, and it’s a place you visit rather than live.
In my opinion the dead zone is only worth visiting once the Hunter can’t move, and that’s the whole trick. A Hunter rooted at 30 yards is a Hunter who stands perfectly still and shoots you, which is the worst thing you can arrange, but a Hunter rooted whilst you walk in to 6 yards can neither shoot you (you’re inside 8) nor reach you (you’re outside 5, and a rooted player isn’t moving, so there’s no leeway to stretch their arm). The band that’s all but gone in motion is three solid yards wide against someone in roots. The other end of it, Bear at their feet with Barkskin and Nature’s Grasp up, is the plan for when the root is on diminishing returns.
- How to execute, open at 30 with Roots if you can see them first, then walk in to about 6 yards whilst it holds, put Insect Swarm up (it cuts their chance to hit, which is worth more against a Hunter than anyone, and ticks lightly enough to leave the root alone), saving Moonfire for when the root breaks, Hibernate the pet or Bash it from Bear if it’s the thing hurting you, and cast Wrath from inside the band where they can’t answer. When it breaks, either go Bear and walk straight at them, which puts you inside 5 where only the pet is hitting you, or back out to 30 and re-root into the half-root. Forever lets them trap in combat on a 30 second cooldown, so count the trap like any other cooldown, and remember a rooted Hunter can still drop one at their own feet, so don’t stand on top of them.
- When to use it, against every Hunter, and the Bear version doubly so against a Survival Hunter whose traps always root in Forever.
- When not to, the dead zone dance at 6 yards against a Hunter who is moving, because the band isn’t there, and standing still at range against a Marksman with a full mana bar and line of sight, which is the one fight a Balance druid should refuse. Hunters also have Scare Beast, which works on you in any animal form, so a Hunter who saves it for the moment you shift has read this guide too.
- Practice drill, with a Hunter friend, stand still and have them walk at you until Auto Shot greys out, then keep walking until Raptor Strike lights, and pace the gap. Then both of you move and do it again. The second gap is the real one. Then duel with the rule that you never cast from inside 8 or outside 30.
- You’ve got it when, a Hunter’s first trap goes off with nobody in it, and you knew it would.
Carrying the flag Probable
A druid is the Horde’s best flag carrier and it isn’t close, because mounting drops the flag and shapeshifting doesn’t, so Travel Form is a 40% speed boost the Alliance can’t take off you with anything but a root, and you remove roots by shifting. The skill is the route, the shifts and the timing, in that order, and it’s Specialist because the first time you do it with four people on you is nothing like the dummy.
The Warsong routes are well documented and I’d stick to the documented ones. The tunnel is fastest and most defended. The side ramp is slower and quieter. The balcony drop and the graveyard cliff both cost a little fall damage and save a lot of time, and they’re the two bits of terrain play I’d call legitimate, because they’re routes rather than spots. The fence hops and roof spots you’ll see in videos are either unreachable on the current map data or treated as exploits in every tournament ruleset I could find, and I don’t want to teach you something that gets you reported.
- How to execute, pick up the flag, hit Travel the moment you’re outdoors (it’s instant in Forever), and run the route your team called rather than the one you like. Every snare is a Travel re-shift, every root the same, and every stun is a Barkskin from inside the form and a wait. If a sheep lands whilst you’re still in caster form, any shift breaks it. Nature’s Grasp goes up before the tunnel, not during it. When you have to stop and fight, stop at a corner, root the fastest thing chasing you, and go again. Hibernate works on a shapeshifted druid where a Mage’s sheep can’t, so an enemy druid is the chaser to root first.
- When to use it, when your team has midfield and the enemy carrier is dead or about to be. A flag carried out early into a full enemy team is a flag you return by dying.
- When not to, when you’re the only healer the team has, when you’re low on mana (a carrier with no mana has no shifts, which is a carrier with no legs), and when a Feral or a Rogue is spare on their side, because a Rogue’s Blind and Crippling Poison and a Feral’s Feral Charge and Hibernate are the two kits built to stop you.
- Practice drill, queue Warsong and spend your first three games as the escort rather than the carrier, running every route beside your carrier in Travel Form, re-shifting on the real snares as they land, and counting how long each re-shift takes you. Carry only once the re-shift is under a second every time, and add the balcony drop once the flat routes are clean.
- You’ve got it when, you cap with three people on you and more than half your mana, and your team stops asking who’s running it.
Stuns from inside a form Confirmed
Forever lets a Tauren use War Stomp whilst shapeshifted, which hands a Balance druid something they never had before, a stun chain that doesn’t require leaving Bear. War Stomp is a half-second cast that stuns everything within 8 yards for 2 seconds on a 90 second cooldown, and Bash in Bear is a stun on a different cooldown. Together that’s a window of several seconds in which a melee stands still and you do whatever you like, and because every potion works in forms now the thing you do might be drink a healing potion or Free Action Potion rather than cast.
The caution is diminishing returns again, because Bash and War Stomp are both stuns and share a counter with Kidney Shot and Hammer of Justice in the only table I could find, which is Wrath Classic data rather than Forever’s, so I’m calling the chain Confirmed and the category Probable. Plan on two stuns, not four.
- How to execute, from Bear, with the melee inside 8 yards. Bash costs 10 rage and a hybrid arrives in Bear with none, so if you’ve just shifted, War Stomp goes first (it needs no rage) and Bash follows once a couple of hits or Enrage have given you the rage. If you’ve been in Bear for some time, Bash first and Stomp as it ends. Use the stun for one thing - a Frenzied Regeneration if you have the rage, a potion, a walk to the corner, or a shift out and a Roots on them so the root lands as the stun ends. A stunned player can’t trinket a root they haven’t seen yet. If they’ve already spent the trinket on your first root, this is the sequence that ends a duel.
- When to use it, when a melee has committed cooldowns and you’re in Bear anyway, and as the setup for the second root of the fight.
- When not to, on a target who has just been stunned by someone else (the counter is shared across everyone on your side), and when the half-second cast of War Stomp will get you killed because the melee is one hit from finishing you. War Stomp can be interrupted by damage like any cast.
- Practice drill, duel a Rogue friend and go Bear on the opener on purpose. Bash, Stomp, and shift out into Roots as the Stomp ends, and see whether the root lands before they can act. It will take a few goes to get the shift-out timed to the stun ending rather than after it.
- You’ve got it when, the Roots that follows your Stomp lands on a player who can’t trinket it, and you planned both.
Five fights
Skills on their own are a list, and nobody fights a list. So here are five fights a Balance druid will have in the first week of Forever, with the skills above combined into a sequence, and the place each one usually goes wrong. The sequences are plans rather than scripts, because the other player gets a say, and the decision tree below is the version I keep in my head for the first three seconds of any of them.
The first three seconds.
Who is on you decides the opening. Everything after that is reading the fight.
A melee, inside 25
- Outside 8 and running at you? Stop and Roots. Inside 8 and you’re below half? Bear. Inside 8 otherwise? Grasp, Roots, walk.
- Walk the root out to 30 before you cast anything with a cast time.
- Dots on lightly, Wrath, Starfire if the root is holding.
- Root breaks and they reach you: Grasp armed, Bear if low.
- In melee, bait the kick with Wrath, cast Arcane through the lock, re-root into the half when it’s worth the global.
A caster, at range
- Is there a wall within three steps? Go to it. If not, make one your first destination.
- Moonkin stays up, because a sheep can’t land on a form.
- Their cast bar starts: step behind the wall. Yours: step out.
- Bait Counterspell with a Starfire, then Roots and Wrath inside the 30 second window.
- Novas and snares are a Travel shift. Chase the Blink with a Moonfire, not your feet.
A Hunter
- Did you see them first at 30? Roots. Did they open on you from range? Break line of sight, root from the corner.
- Walk the root in to 6 yards, where they can neither shoot nor reach.
- Hibernate or Bash the pet, Insect Swarm up, Wrath from inside the band.
- Root breaks: Bear at their feet, Barkskin, Nature’s Grasp.
- Count the trap and the Scatter Shot, and never jump-turn into a ready one.
A Warrior closes the gap
Opponent   Arms Warrior, Mortal Strike and Intercept up
Map        Arathi Basin, open ground between Blacksmith and the Farm road
Their plan Charge or Intercept, Hamstring, Pummel the heal, win the health race
Your goal  Keep them outside 8 until their cooldowns are gone, then win on mana
Hold 26 to 30 yards whilst he’s out of combat, because Charge stops at 25 and a Warrior who has to run is a Warrior who has to run through a root. When he commits and starts running, that’s your Roots cast, started at 25 and landing at about 15, and the moment it lands you walk, calmly, to 30. Moonfire and Insect Swarm go on lightly, two Wraths, and a Starfire if the root is still holding, which with light dots it should be. He’ll trinket the root or wait it out, and either way the next thing he does is Intercept, which is a three-second stun you can’t shift out of, so don’t try.
- Hold 30
- Roots as he runs
- Walk to 30
- Dots, lightly
- Wrath, Wrath
- Starfire
- Intercept lands
- Bear, Barkskin
- Grasp roots him
- Cancel form
- Re-root or Starfire
When the stun ends you’re in melee with a Warrior in Berserker Stance, which means Pummel is available and Hamstring is coming. Bear with Barkskin inside it, Nature’s Grasp armed before he arrived so his first swing has a chance to root him, and if it does, cancel the form (free), walk out, and decide between a Starfire and the half-length second root. If Grasp doesn’t fire, War Stomp buys two seconds straight away, Bash buys more once his hits have given you the rage, and the potion works from inside the form. The fight is won by the druid who still has mana at ninety seconds, so count shifts, take the mana potion behind the Blacksmith wall, and never backpedal, because a Hamstrung druid walking backwards is a Warrior’s favourite thing in the game.
Where it goes wrong is almost always the root. Either you cast it at 20 and stood there, so the second Wrath broke it with him two steps away, or you shifted during the Intercept stun and spent a global and the mana on nothing, or you re-rooted into the quarter-length third root and were surprised when it lasted three seconds. If he’s a good Warrior and he trinkets the first root, remember the trinket is now gone for a long time, and the stun-then-Roots sequence at the end of the Specialist tier is the one that finishes the duel.
A Mage at range
Opponent   Frost Mage, Counterspell and Blink up, Polymorph ready
Map        Warsong Gulch, the ramp and hut on your side of midfield
Their plan Nova, Frostbolt, sheep the heal, Counterspell the Starfire, kite with Blink
Your goal  Fight at a corner, stay in a form, spend their Counterspell on a cast you didn’t need
Casters are the matchup where the Foundation tier matters least and the corner matters most. Pick the hut before the fight and fight within three steps of it. Stay in Moonkin, because a form can’t be sheeped and a Balance druid who shifts to caster form to heal has just handed a Mage a long window with a sheep in it. When their cast bar starts, step behind the hut and it fails. When yours starts, you’re the one out in the open for a second and a half, which is the trade. A Frost Nova is a Travel shift, and because Nova is only ten yards wide they’ll have Blinked away before you’re out of it, so don’t chase the Blink with your legs, chase it with a Moonfire and let them come back to you.
- Pick the corner
- Moonkin, dots up
- Starfire as bait
- Counterspell lands
- Roots, Nature is open
- Wrath, Wrath, Wrath
- Nova, Travel shift
- Moonfire the Blink
- Starfire when they return
Counterspell is the fight. It’s off the global, it lands from 30 yards and it locks a school for ten seconds on a 30 second cooldown, so the plan is to spend it on a Starfire you didn’t need, take the Arcane lock, and use the 30 seconds that follow to root and Wrath without fear of interruption, since Roots and Wrath are Nature. Insect Swarm is worth more here than its damage suggests, because the hit reduction applies to every Frostbolt. If they go for the sheep whilst you’re in Moonkin it doesn’t land, and if you have to leave the form to heal, do it behind the hut where the sheep can’t be cast either.
Where it goes wrong is the open ground. A Balance druid in midfield against a Mage is in a casting race against someone with a cheaper, faster cast and an escape, and the only thing that changes the maths is terrain. The other failure is chaining roots into diminishing returns on a target who was never going to stand there anyway, because a rooted Mage with Frostbolt is a rooted Hunter, happy to be stood still.
A Hunter
Opponent   Marksmanship Hunter with a cat, Scatter Shot and a trap ready
Map        Arathi Basin, Lumber Mill, the ramp down to the river
Their plan Open at 35, Wing Clip if you close, trap you if you stand still, Viper Sting your mana
Your goal  Take away the one thing a Hunter needs, which is the right distance
The fight is decided by who sets the range. If you see them at 30 before they see you, Roots first and everything else second. Then walk in to about 6 yards whilst the root holds, which is the only moment the dead zone is a place rather than a theory, because a rooted Hunter can’t step back to 8 or forward to 5. Hibernate the pet, which works on beasts and lasts long enough to matter, Insect Swarm and a light Moonfire on the Hunter, and Wrath from inside the band. They’ll Scatter Shot you, which is four seconds you spend disoriented and a cooldown they’ve spent, and they can drop a trap at their own feet, so stay a step off them.
- Roots at 30
- Walk in to 6
- Hibernate the pet
- Insect Swarm
- Wrath, Wrath
- Scatter Shot
- Root breaks
- Bear at their feet
- Barkskin, Grasp
- Bash, walk through
- Re-root into the half
When the root breaks you have two good places and one bad one. Bear at their feet is good, because you’re inside 5 and the only thing hitting you is a sleeping cat. Thirty yards with line of sight broken is good, because a Hunter with no line to you is a Hunter doing nothing. The bad place is 20 yards in the open, stood still, which is where Viper Sting and Aimed Shot live. The October Forever notes add a half-second standing rule before an Auto Shot fires, which rewards you for keeping them moving.
Where it goes wrong is the folklore. Dancing at 6 yards against a Hunter who is also moving puts you inside a melee reach that leeway has stretched to nearly 8, and the Wing Clip that follows is a free one. The other failure is the jump-turn, which is the most predictable moment in your kite and exactly when a good Hunter times the Scatter Shot, so against Hunters, turn less and strafe more.
Holding Blacksmith alone
Opponents  A Rogue and a Priest, incoming from the Farm
Map        Arathi Basin, Blacksmith, the building and the flag
Their plan Sap or stun the defender, cap the flag, hold it until help comes
Your goal  Delay, not kill. A flag that never ticks is a win even if you die on it
Call it the moment you see them, with a number, because “2 inc BS” typed early is worth more than any spell you own. Then fight on the flag and not near it. The capture is a channel that any damage breaks, so a Moonfire ticking on whoever touches it is a cap that never completes, and Hurricane (which the Forever notes say has lost its cooldown, a Probable I’ll check on launch) channelled over the flag is a wider version of the same idea, although every hit you take shortens the channel in this era, so cast it when they go for the flag rather than for you. Faerie Fire goes on the Rogue the moment you see him, because a Rogue who can’t re-stealth is a Rogue who has to fight you in the open, and Nature’s Grasp goes up before the opener you know is coming.
- Call it, with a number
- Grasp up, Faerie Fire the Rogue
- Opener lands
- Trinket only if it lets them cap
- Bear, Bash, Barkskin
- Roots the Rogue, corner the Priest
- Moonfire anyone on the flag
- Hurricane when they cap
- Repeat until help arrives
Root the Rogue, with Faerie Fire still on him so a Vanish doesn’t free him, and corner the Priest, in that order, because the Priest can’t cap whilst Moonfire is on him and the Rogue is the one who kills you. The building is your wall and the flag is the thing you never step more than ten yards from, which means you’ll give up a lot of good positions to stay close, and that’s correct. A Priest will fear you, and shifting does nothing for a fear, so the trinket question is simple - does the fear let them cap? If yes, trinket. If no, let it run. Hold for 30 seconds and the base is usually saved, hold for a minute and it certainly is.
Where it goes wrong is the chase. The Rogue steps off the flag, you follow him for the kill, and the Priest starts the cap behind you. The other failure is Travel Form, which is the right answer to every snare in the guide and the wrong answer here, because a druid who runs has left the flag. Die on it if you have to. The tally screen doesn’t count bases held, but your team does.
Running the flag out of the tunnel
Opponents  A Warrior and a Mage, arriving as you pick up
Map        Warsong Gulch, Alliance flag room, tunnel, midfield, your ramp
Their plan Hamstring and Nova in the tunnel, Intercept in midfield, Counterspell the Roots at the ramp
Your goal  Cross the map with the flag and more than half your mana
Nature’s Grasp goes up before you touch the flag, not after, and the pick-up itself is the only moment you’re stood still. Then Travel Form the instant you’re moving (Warsong counts as outdoors almost everywhere, flag room included, as far as I can tell, and the test list has the exact spots) and run the route the team called. A Hamstring in the tunnel is a Travel re-shift, a Nova is another, and each one costs mana you were going to need, which is why the mana you arrive with decides whether you cap. The Warrior’s Intercept is the one thing on the route you can’t shift out of, so the moment it lands you Barkskin from inside the form and wait the three seconds out, and the Mage’s sheep can’t touch you whilst you’re in Travel.
- Grasp before pickup
- Travel Form
- Tunnel, full speed
- Hamstring, re-shift
- Nova, re-shift
- Midfield
- Intercept stun
- Barkskin, wait
- Roots the Warrior at the ramp
- Travel, cap
Twice on a good run you’ll need to stop, and the rule for the stop is the same as for every fight above - do it at a corner, root the fastest thing chasing you, and go again. At the bottom of your ramp the Warrior is usually the one still with you, and a Roots there, with Grasp having already taken one of his earlier attempts, is the cast that ends the run. Leaving the form is free, so the sequence is cancel, Roots, Travel, which is one shift’s mana rather than two. If you have to drop below half mana to get there, you’ve done it right. If you arrive empty, you got lucky.
Where it goes wrong is the early run. A druid who picks up with the enemy carrier alive and their team in midfield is running into five people, and no amount of shifting fixes five people. The other failure is the healer who runs, because the team now has no healer and a carrier who can’t heal themselves in Travel Form. If you’re the only healer, leave the flag for a Warrior to pick up and heal him across.
Drills and the checklist
Every skill above came with a drill, and here is how I’d put them together into a week, because a drill you do once is a thing you read about. Twenty minutes a day, in this order: five minutes of Foundation on a standing target or in a city (strafing laps, the front arc circle, instants on the move), ten minutes of whichever Intermediate skill is newest, and two duels with a single rule attached, such as “I may root three times” or “I say the form before I press it”. One tier a week is a reasonable pace, and the Specialist tier is for the month after that. If you want to know whether it’s working, the mastery indicators are the test, and they’re deliberately things another player would notice rather than things you’d feel.
So before you queue, ask yourself the questions this guide is really about. Are your strafe keys where your fingers rest, and is S gone? Can you say which school a kick would lock before you cast? Do you know where 25 yards is from the way your bar lights up? When the last duel went wrong, was it a trick that failed or a habit underneath it? If the answers point at the habits, start at tier one again, and no shame in it, because every later tier is built on those habits.
The checklist.
Print it, tick it before the first queue of the day, and come back to it when a fight goes wrong.
- Setup
- Strafe on
AandD, turn keys unbound,Sunbound for a week - Camera zoomed out to the maximum the client allows
/stopcastingon its own key, and at the top of every shift macro- Bear and Travel on keys your fingers already reach
- Roots and Nature’s Grasp reachable from inside Bear
- Foundation
- I strafed away from every melee and never backpedalled
- I kept the target in my front arc with the mouse, not the keys
- Every global on the move was an instant, every hard cast was stood still
- I shifted out of roots and snares, and never out of a stun or fear
- I knew where 8, 25 and 30 were without an addon
- Nature’s Grasp was up before every melee reached me
- Intermediate
- Jump-turns landed and I never jumped with a cast up
- I fought beside a wall and stepped behind it when their bar started
- Every root was walked to range before I cast
- I faked at least one cast against anyone with an interrupt
- I said the form before I pressed it
- Advanced
- I named the school before every hard cast
- I counted three cooldowns on the player on me
- I treated the third root as three seconds, and planned for it
- I counted my shifts and could give each one a reason
- Specialist
- I only visited the dead zone whilst the Hunter was rooted
- Grasp went up before the flag, and the route was the team’s
- Bash, Stomp, then Roots, and only two stuns planned
Still to test
Everything marked Unverified or Probable above is on this list, with how I intend to settle it once the servers are up, because a guide that says “confirmed” about things nobody has tested is the thing I’m trying not to write. I’ll edit this post as each one is settled, and say so at the top when I do.
- Pushback per hit, stand in front of a friend’s Warrior with a stopwatch and cast Starfire, and count how much each swing adds. The two-hit cap is Wrath’s, not ours, and the exact Forever number decides how bad hard-casting in melee really is.
- Roots behind you, have someone stand directly behind me and cast Roots without turning. The 1.1 note says it works, nobody I trust has checked it on this client.
- Roots indoors and where indoors is, cast it in the Ragefire Chasm tunnel, the Blackrock Mountain interior, the Orgrimmar bank, and every battleground building I can find, and write down which refuse. My working assumption that Warsong and Arathi count as outdoors nearly everywhere needs checking spot by spot.
- Nature’s Grasp and diminishing returns, let a friend eat a Grasp root and then cast Roots on them, and see whether the second is half length. The Wrath table says it will be, and the Wrath table isn’t Forever.
- The Forever trinket, read the Rank 2 tooltip the day someone earns one, and find out whether it removes roots for every class.
- Barkskin’s cast penalty, read the tooltip. The Forever guides say the slower cast is gone, and if so Barkskin becomes a casting tool as well as a defensive one.
- Plainsrunning in forms, run 150 seconds in Travel Form and then in caster form and compare, then take a hit in each and see how many stacks go.
- Bash, War Stomp and the stun category, Bash a friend, Stomp them as it ends, and time the second stun.
- Shift costs at 60, read every form’s tooltip with and without Natural Shapeshifter and replace my rough 350 with the real number.
- The facing cone, BigRedKitty’s 60 degrees a side is a 2007 measurement, and the Forever client may differ. Strafe a circle around a dummy and find the angle at which Moonfire refuses.
- Hunter traps in combat, how long a Freezing Trap holds a druid in Bear, and whether Forever’s Scare Beast still works in Travel Form.
All of this to say, the skills are learnable, the order matters more than the tricks, and the honest version of a mechanics guide written three days before launch is one that tells you which of its claims it has checked. If you drill the Foundation tier until it’s boring, add one Intermediate skill a week, and treat the rest as things to try once the first ten are automatic, then I wish you every success in the first fortnight of Forever, and I’d expect the Warriors on your server to stop enjoying the sight of you fairly quickly.
I’ll be running every drill in here on the stream from launch day, badly at first like everyone, and correcting this post in print as the test list gets shorter. You’ll find me live most weekdays from midday AEST, the build it all hangs off is in the Restokin approach, and the datamine that moved some of these talents is in the datamined changes.
Contributing to this guide
If you’ve tested something on the list above, or you can show me a mechanic here that’s wrong on the live client, I want to hear it, and I’ll credit you by name when I correct the post. The easiest way is to tell me on the stream, and the way that doesn’t get lost is to open an issue on the Restokins GitHub, with a clip if you have one. A clip beats an argument every time.
Sources and credit
This is a pre-launch guide built from the Classic rules Forever inherits, the Forever change notes and datamines, and the people who tested the parts that could be tested. Every label in the text comes from checking the claim against these, and the ones that didn’t survive the check are in the test list rather than the body.
- BigRedKitty, The Jump Shot - the original drill for the jump-turn, and still the best one.
- WoW Insider, 3 skills to improve your arena performance - the juking and movement drills.
- Warcraft Wiki, Druid shapeshift forms - what shifting breaks and what it doesn’t, with the patch history.
- Warcraft Wiki, Entangling Roots - the 1.1 facing change, the 1.4 diminishing returns change, and the Forever entry.
- Warcraft Wiki, Diminishing returns - the Classic reset window and the category table, which is Wrath Classic data.
- Warcraft Wiki, Pushback - the 3.0.2 note that shows the two-hit cap arrived after our era.
- Blizzard’s Classic not-a-bug list - melee leeway as original behaviour.
- Forever DeadZone - the dead zone measured on the beta client.
- Fouren, WoW Forever Balance Druid overview - the Forever Balance kit, including Nature’s Reach and the moving instants.
- Warcraft Tavern, Forever druid guide and the Hunter and Druid deep dive write-up - forms, consumables, Barkskin and Furor in Forever.
- Warcraft Tavern, Tauren racials in Forever - War Stomp in forms and Plainsrunning.
- Warcraft Tavern, Forever hunter guide - traps in combat, Entrapment and the pet changes.
- Wowhead Classic, Counterspell, Kick and Earth Shock - the interrupt numbers.
- Warcraft Tavern, Classic druid macros - the
/cancelformand conditional behaviour the shift macros rely on. - Blizzard, PvP progression in WoW Forever - honour, ranks and the Rank 2 trinket.
Twitch / YouTube
See the drills run live.
Mon to Fri · 12:00 to 2:30 pm AEST · 02:00 to 04:30 UTC. Check the channels for actual broadcasts and videos.